TAG...you're it! With Concord & 9th


We're THRILLED to bring you a collaborative post with one of our FAVORITE new companies - CONCORD & 9TH!
![]()
Angie and Greg (owners) are some of the most amazingly talented, driven, hardworking, organized, generous and kind people on the planet. All this AND then throw in FUN and you have Angie and Greg!


Their products are the most Innovative and Unique products I've seen in a long time. The investment you make in them are well worth it! You'll find yourself using them over and over and over again! They brought us the AMAZING Take a Bough tree dies, Sophisticated Script alphabets and the HUGS and THANKS card dies that are taking the stamping/crafting world by storm! If you don't have them yet, you'll want to have them!
Concord & 9th is celebrating their one year Birthday this month! Congrats guys!
Head over to our Instagram and Facebook page to enter our $50 giveaways! You can enter on both Insta and Facebook to increase your chances!
@HallmarkScrapandCrafts (Instagram)
Hallmark Scrapbook Facebook Page
And now on with the incredible TAG projects Angie created for us.
TAG...you’re it!
__________________
Hello! Concord & 9th here! We have been working with Jody and the Hallmark Scrapbook & Crafts team for some time now. We just adore Jody and her team, so we thought it was time to collaborate on a blog post showing some fun ideas to adorn your holiday packages. Yes, it’s only August 18th, but Christmas will sneak up on us before we know it. We think that if you make a handful of tags here and there, you’ll be ready to dress up your packages, and enjoy the crafting process, rather than stressing out in December!
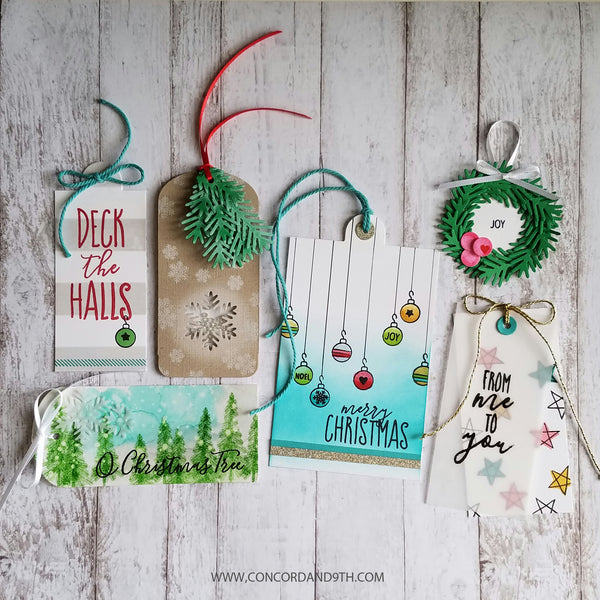
Today we’ve made 6 different tags to help jump-start your creative ideas! Each tag offers it’s own look and highlights different techniques. You could make a bunch of one design, or have fun making lots of different tags.
The products we’ve used are from Concord & 9th and can all be found at Hallmark Scrapbook & Crafts.
When we designed the O Christmas Tree stamp set we wanted the images to work on cards, but also on tags. The sentiments are sized to work with our Bags & Tags dies either portrait or landscape. The Bags & Tags dies offer different options for different tag toppers, bag toppers and even a word bubble. The Take A Bough dies can make fun 3D trees, pine boughs, wreaths, and even multiple sizes of snowflakes! The Stripe Builder stamp set is a great basic set for building striped backgrounds, either large or small. You can even create plaids, which are very popular during the holidays!

Here are a few more details on each individual tag:

DECK THE HALLS: This is a quick & easy tag. We used the Stripe Builder stamp set to create the bold, gray stripes in the background, and the teal dashed lines along the bottom of the tag. Using a MISTI makes it easy to stamp those big stripes! Stamp “deck the halls” from O Christmas Tree stamp set in red ink over the stripes. Stamp the outline of the small ornament in black ink so it hangs off the bottom of the ‘S’. The inside of the ornament is the solid circle in the stamp set stamped in green ink, and the tiny star in black ink. Use Bags & Tags dies to die cut the top of the tag shape. Finish it off with your favorite twine.


SNOWY SHAKER: Start with a kraft piece of card stock. Die cut the large snowflake from Take A Bough dies towards the bottom of the tag leaving the negative space. Stamp the little snowflakes from O Christmas Tree stamp set in white on to the tag. Use that same white ink to do a little blending around the die cut snowflake to highlight the area so it pops! Die cut green boughs using the different sizes bough dies from Take A Bough dies. Blend some white ink on the boughs too so they look frosted. Tie those to the top of the tag with your favorite ribbon/twine. The top of the tag is die cut with Bags & Tags dies too. Now for the shaker part - use foam tape or craft foam on the backside of the tag in between a piece of acetate. Fill it with your favorite beads, or sequins and adhere it to the back of the tag. Shake away!


O CHRISTMAS TREE: On watercolor paper, stamp the trees from O Christmas Tree stamp set in green ink. Watercolor an aqua sky. Spritz water over the top and dab off with a paper towel. The ink will lift off where the water splatters, leaving a snowy look in the sky and over the trees. Dry completely. Stamp O Christmas Tree in black ink over the trees. Die cut the large and medium snowflakes from Take A Bough dies and adhere them on to the tag with a clear drying glue. Die cut the rounded top of the tag with Tags & Bags dies. Finish it off with your favorite ribbon or twine.

MERRY CHRISTMAS: Start with a white piece of card stock. Use a blending tool and distress inks to blend ink on the bottom portion of the tag. Stamp the little ornaments at a variety of lengths on to the tag. The little, tiny images in the O Christmas Tree stamp set such as “JOY”, “NOEL”, the heart, star, small snowflake and little stripes are meant to fit inside the ornament. Stamp MERRY CHRISTMAS in black. Use a permanent black marker & a ruler to draw strings down to the ornaments. Add a little strip of glitter paper, and a glitter tag reinforcer die cut from our Bags & Tags dies for a little bling.

JOY WREATH: This is easier than it looks! Die cut the white circle from our Bags & Tags dies. Stamp JOY from O Christmas Tree stamp set in black ink onto the white paper. Die cut small, green bough sprigs from Take A Bough dies. Adhere the sprigs around the white cardstock circle. Top it off with berries die cut from Take A Bough dies, with a little heart stamped on the berry from O Christmas Tree stamp set, and white ribbon.
And, last but not least,
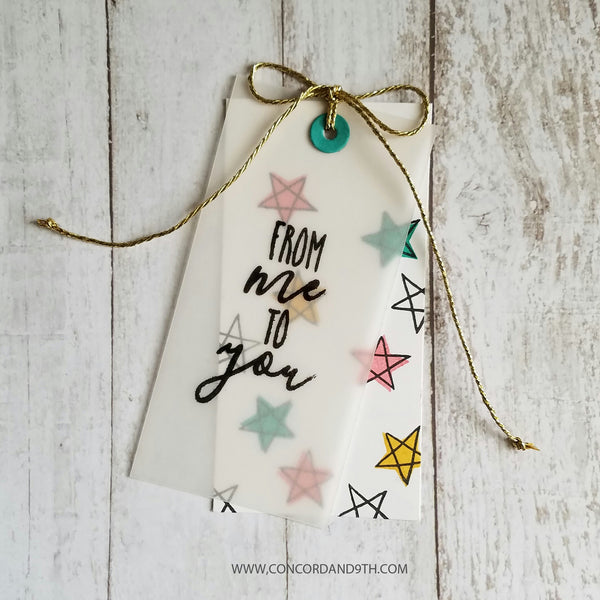
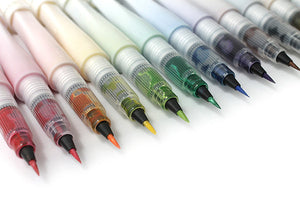
FROM ME TO YOU: From the O Christmas Tree stamp set, stamp “from me to you” in black ink onto vellum and the hand-drawn stars onto white cardstock. Add color to some of the stars with your favorite coloring medium. For these we used Zig Clean Color Markers. Finish off the tag with a die cut reinforcer from Bags & Tags dies and some gold twine. It’s fun to see the background through the vellum!
So, there you have it. Six tags, all with different techniques such as watercoloring, ink blending and paper piecing, different looks, yet all the same stamps & dies. We know it’s important to make those crafty dollars stretch, so we do our best to design products that can be used in multiple ways. If you like these tags, try incorporating these same ideas onto cards!
Now, we’d really like to see what you create with these products! Be sure to TAG us @concordand9th and #concordand9th so we can be inspired by you! Tag...You’re it!
THANK YOU so much to Jody for collaborating with us today! We look forward to future collaborations and many more years working together!
- Jody Kirk

Comments 62
DeeDee
Oh my gosh! So cute, all of them! Makes me wanna go make some tags now.
carol
What a lovely array of tags, featuring sets that have totally captured my interest! Feeling all festive….and inspired! Thank you for the showcases and ‘how to’ details!
~carol
Carol
I have been looking for the Take A Bough dies. The rest of the items made such cute tags. Love it.